Installation Video
Coming Soon
Watch Our Complete Installation Walkthrough
Our detailed video guide walks you through the entire installation process, from unboxing to your first successful dock connection.
What's Included
Every TIDIN Quick-Connect System comes complete with everything you need for installation.
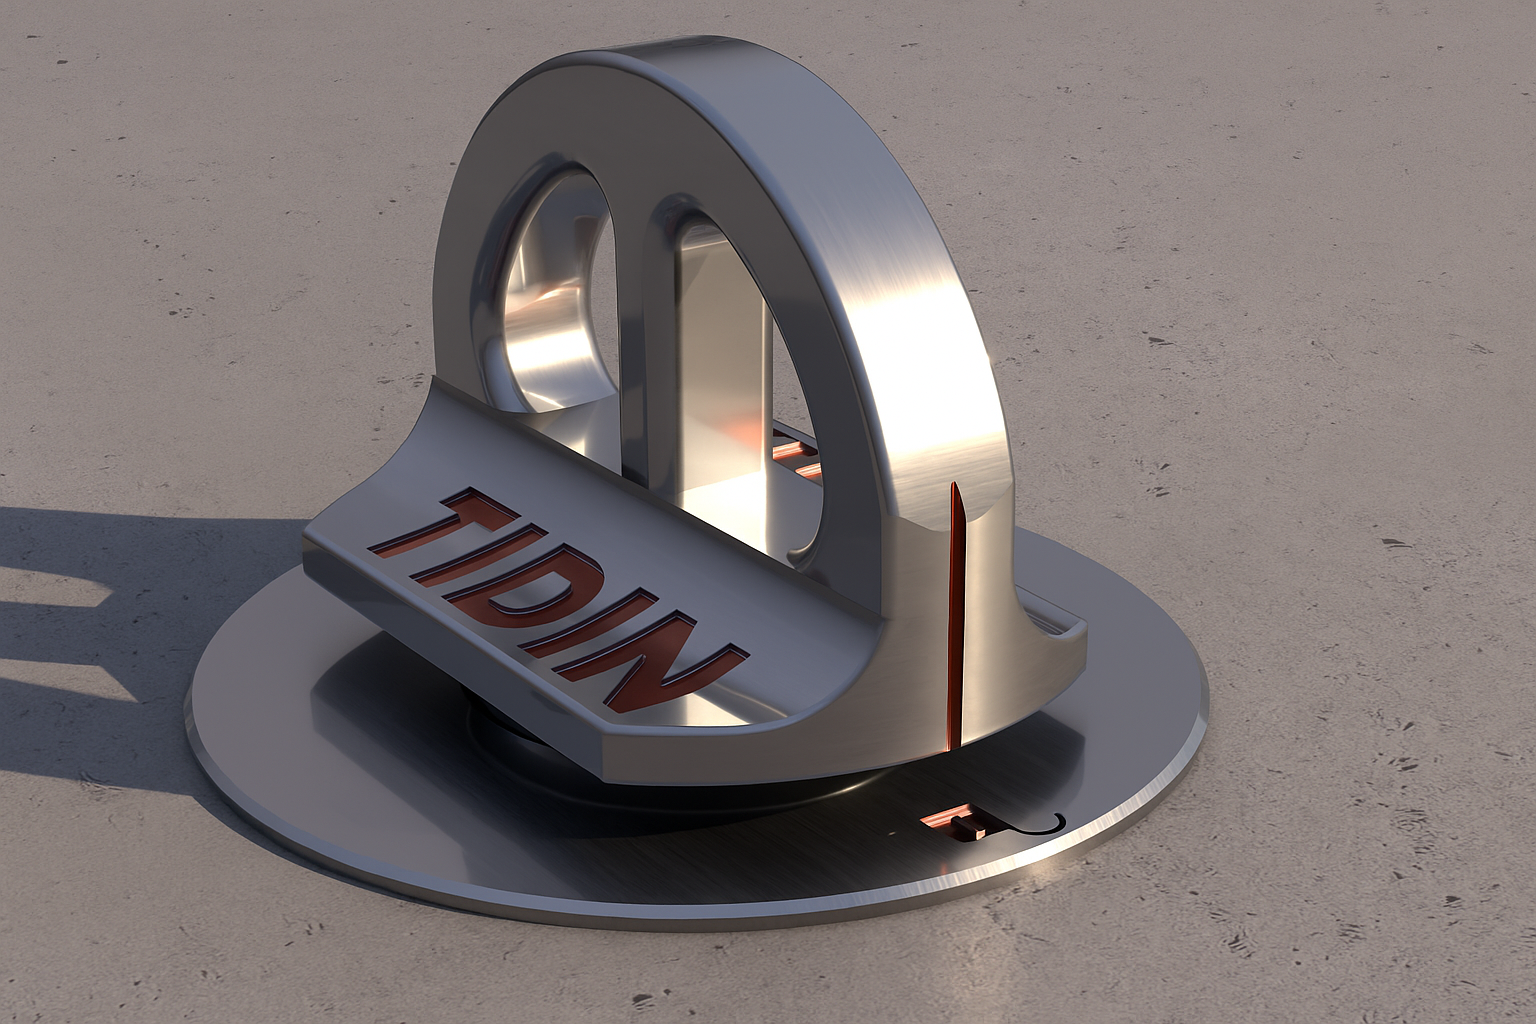
Boat Connector Kit
- Connector strut assembly
- Mounting base plates (2)
- Marine-grade stainless hardware
- Sealant and gaskets
- Installation guide
Dock Receiver Kit
- Receiver assembly with locking mechanism
- Wide-entry guide funnel
- Mounting bracket
- Hardware for wood/composite docks
- Quick-release handle
Boat Connector Installation
Position the Mounting Brackets
Identify the optimal mounting locations on your boat's hull. The connectors should be positioned to align with the dock receivers when properly docked.
Secure the Base Plates
Using the provided marine-grade hardware, secure the base plates to your boat. Ensure all bolts are properly tightened and sealed.
Attach the Connector Struts
Connect the strut assembly to the base plates. The struts are designed to extend to the correct position for dock engagement.
Test the Connection
Before heading out, test the connector alignment with your dock receiver to ensure smooth engagement.
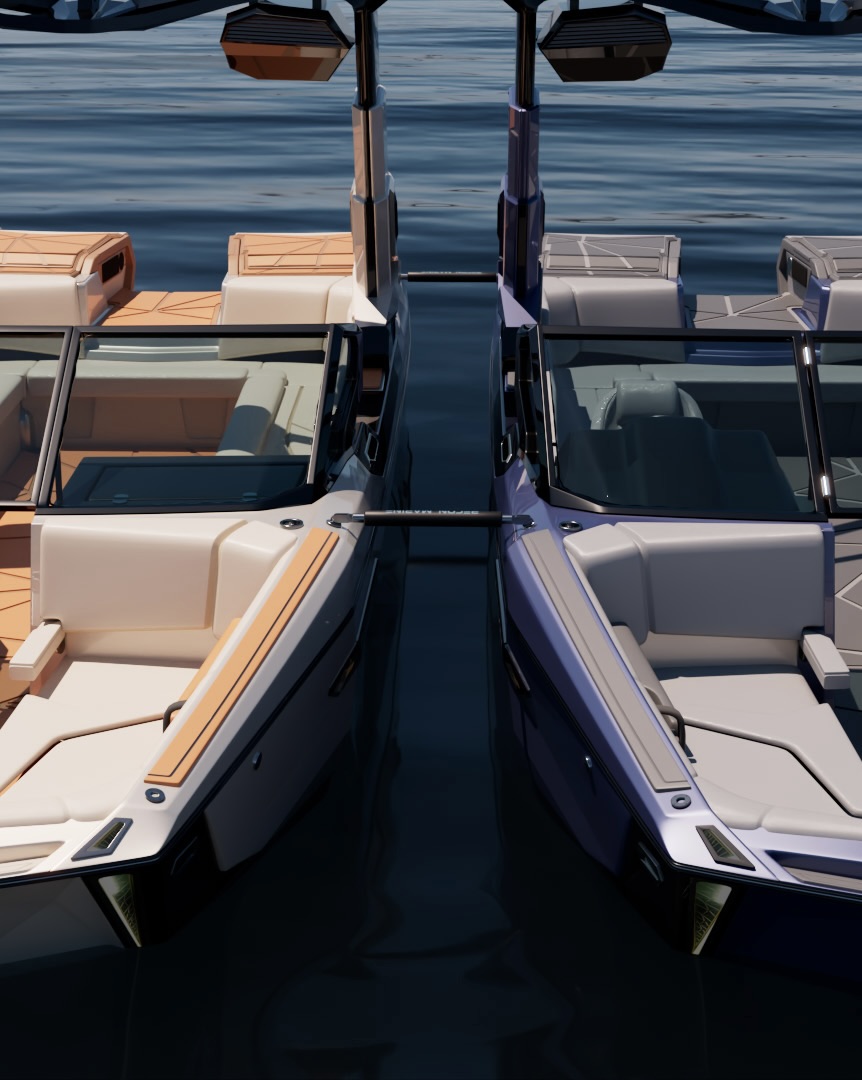
Dock Receiver Installation
Choose the Mounting Location
Select the position on your dock that aligns with where your boat typically sits. Consider water level changes and boat positioning.
Install the Receiver Bracket
Mount the receiver bracket to your dock using the included hardware. The bracket is designed for both wood and composite dock surfaces.
Attach the Guide Funnel
Connect the wide-entry guide funnel to the receiver bracket. This component makes alignment easier during docking.
Verify Alignment
With your boat in position, verify that the connector and receiver align properly. Make any necessary adjustments.
Installation FAQs
How long does installation typically take?
Most installations can be completed in 2-4 hours. The dock receiver installation is usually faster (1-2 hours), while the boat connector may take a bit longer depending on your vessel.
Do I need special tools?
Standard hand tools are sufficient for most installations. We recommend a drill, socket set, and marine sealant. All mounting hardware is included with your TIDIN system.
Can I install it myself?
Yes! Our system is designed for DIY installation. However, if you'd prefer professional installation, we can recommend certified installers in your area.
Will it work with my existing dock?
The TIDIN system is designed to be compatible with most dock types, including wood, aluminum, and composite docks. Contact us if you have specific questions about your setup.